
Our iPads are now essential tools for work, play, and communication in this digital age. Nonetheless, a common problem that many iPad owners face is a broken charging port. A defective charging port can be inconvenient, whether it’s because of accidental damage or general wear and tear. Whether you decide to fix the charging port on your iPad on your own or hire a professional to get an iPad charging port repair service, we’ll go over step-by-step instructions in this guide.
This guide will give you the tools to get your iPad back in the game by going over both professional and do-it-yourself repair options.
Before We Begin: Diagnose the Problem
It’s critical to identify the cause of the charging port problem on your iPad before beginning any iPad charging port repair. Not every charging issue is related to the port. Here’s a quick detective work to identify the offender:
- Faulty Cable or Adapter: Switch out the power adapter and cable if you think they’re defective. For optimal results, use an official Apple device or borrow one from a friend.
- Debris and Lint: An obstructed port may impede communication. To remove any dust bunnies, use compressed air or a toothpick (very gently!).
- Software Error: Restarting is all that is necessary at times. To turn it back on, press and hold the power button until the “slide to power off” prompt shows.
An iPad charging port repair may be required if these fixes are ineffective and your iPad refuses to charge. Let’s explore the realm of resolving that tricky port!
DIY iPad Charging Port Repair – For the Bold and Savvy Users

Do-it-yourself iPad charging port repairs could be your thing if you’re steady-handed and don’t mind tinkering. But taking this route calls for vigilance and the appropriate equipment. Here’s a summary of things to think about:
Tools You’ll Need
Acquire the necessary tools if you choose to fix the charging port yourself. These instruments are easily obtained in repair kits made specifically for repairing iPads.
- Tool for prying (a plastic spudger is suggested)
- Heat guns or iOpeners (for loosening adhesive)
- A tiny set of Phillips screwdrivers
- Replacement charging port (fits the particular iPad model you own)
- Tweezers—optional
- High-purity isopropyl alcohol (90 per cent or more)
Safety Matters during iPad Charging Port Repair!
- Power Down: Prior to disassembling your iPad, always turn it off entirely.
- The Key Is Patience: Avoid exerting pressure. Take your time and pay close attention to every step.
- Little Components Warning: Observe screws and other parts. It may be useful to use a magnetized mat to keep them from vanishing.
- Photography Power: To help with reassembly, take pictures while disassembling.
Finding the Right Parts
Find out the model number of your iPad. It’s typically located on the device’s back.
Look for a reliable online vendor that offers a premium replacement charging port that is made especially to fit your model.
Online Resources
There are tons of iPad charging port repair guides available on the internet. Look for step-by-step instructions or video tutorials tailored to your iPad model. These resources will offer a step-by-step visual guide to the disassembly procedure.
Prepare Your Workspace
Locate a spotlessly tidy, well-lit area where you can use your iPad with comfort. To prevent scratches or other damage to the iPad’s screen while it is being repaired, place a soft cloth or towel down. Make sure you have enough room to arrange the iPad and any other small parts you may need.
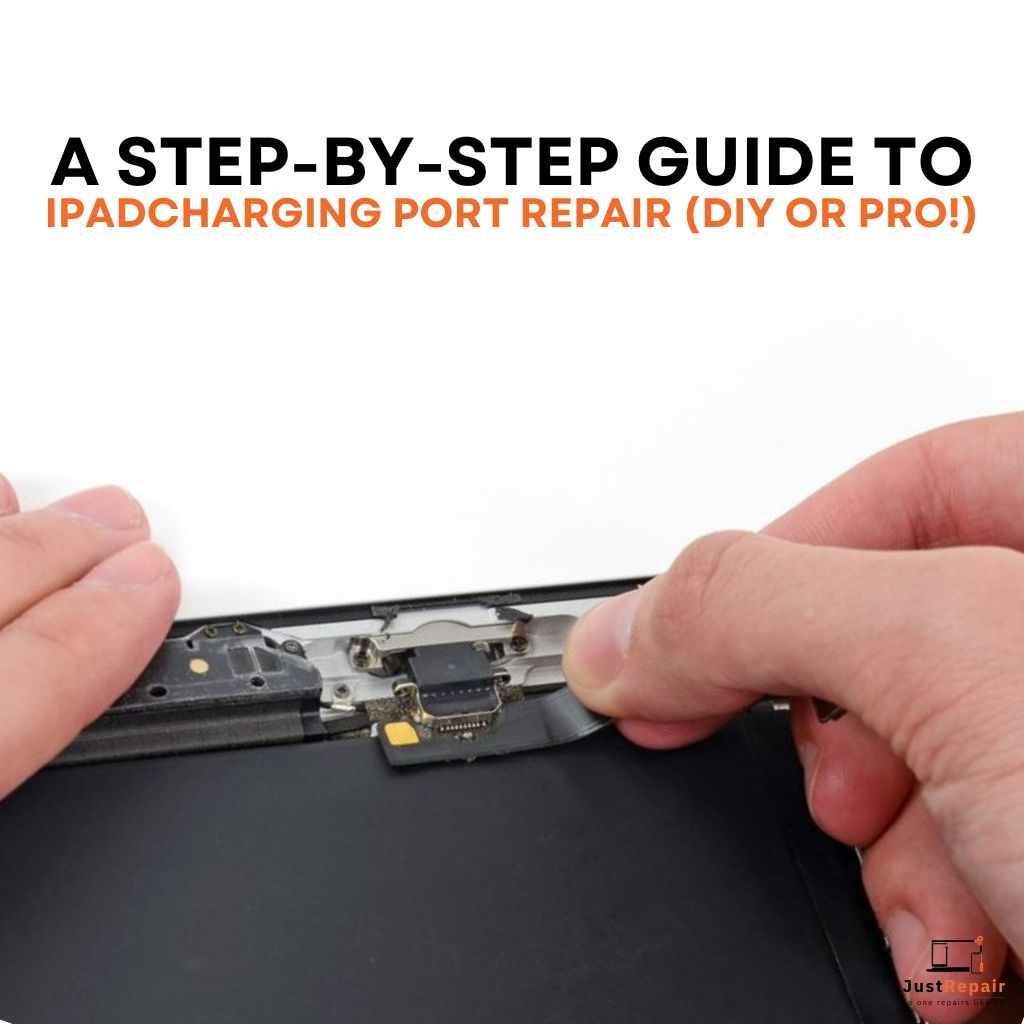
Disassemble the iPad
Using the Phillips screwdriver, carefully remove the screws holding the iPad’s display assembly in place. After removing the screws, carefully pry open the iPad’s display assembly with the spudger or plastic opening tool. Work slowly and take your time so as not to harm the iPad’s delicate internal parts during the iPad charging port repair process.
Take Out the Old Charging Port
Find the iPad’s charging port assembly inside, then carefully unplug any wires or connectors that are connected to it. To remove any glue or screws holding the charging port in place, use the tweezers. After removing the old charging port, put it aside to be disposed of.
Installing the New Charging Port
Carefully place the replacement charging port assembly in the same spot as the original charging port. Make sure to use the provided screws or adhesive to firmly attach the new charging port. Make sure everything fits snugly and securely in the new charging port by reconnecting any cables or connectors during your DIY iPad charging port repair journey.
Put the iPad Back Together
Reverse the disassembly procedure to carefully reassemble the iPad after the replacement charging port has been installed. Before tightening the screws holding the display assembly in place, replace them and make sure everything is positioned correctly. Turn on the iPad and check that the charging port is working properly.
Important Note:
If you’re not comfortable doing the repair yourself, there’s a chance you could end up doing more damage to your iPad. DIY iPad repair can be challenging. If you’re unsure, you should think about getting expert advice.
Think About Getting Professional Assistance
Seek professional assistance if you feel uneasy doing the iPad charging port repair yourself or if you run into any problems while doing so. There are plenty of repair facilities and skilled technicians who specialize in iPad repairs and can identify and resolve charging port problems quickly.
Hiring a professional repair is the best option for people who want a stress-free resolution. This is what to anticipate:
Advantages of Expert iPad Charging Port Repair Services
- Expertise: Skilled technicians possess the information and expertise necessary to identify the problem and resolve it effectively.
- Appropriate Tools: For a secure and effective repair, professionals have the necessary tools and equipment.
- Warranty: For your peace of mind, a lot of repair shops provide warranties for their work.
- Time-saving: You don’t have to take hours to disassemble and research your iPad. Let the experts handle it!
Locating a Reliable iPad Charging Port Repair Company
- The study is Crucial: Seek out repair companies that have experience repairing iPads and good customer feedback.
- Warranty Inquiry: Find out if the repair service is covered by a warranty.
- Cost Comparison: To compare prices, get quotes from a few different shops.
Just Repair to the Rescue!
We at Just Repair know how frustrating it can be to have an iPad that won’t work. Reviving your devices is a passion for our team of certified technicians. For your peace of mind, we provide prompt, trustworthy charging port repairs for all iPad models, along with a guarantee on our labour.
The Choice is Yours!
Both professional and do-it-yourself iPad charging port repair options are available. When choosing, take into account your degree of comfort, your level of technical expertise, and the importance of your time. Whichever path you decide on, you now have the knowledge to get your iPad charging and working at its best again thanks to this guide.